반응형

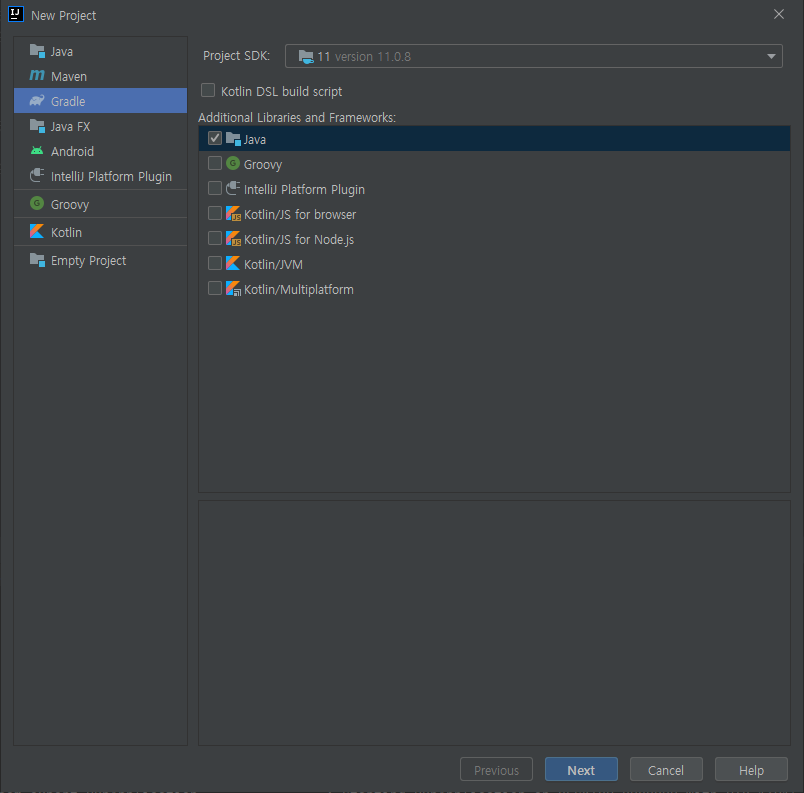
스프링부트에서 STOMP를 이용한 메세지 pub/sub 예시

build.gradle에서 라이브러리를 추가해주십쇼 

implementation 'org.springframework.boot:spring-boot-starter-websocket'


웹소켓 설정파일 WebsocketConfig.java 을 아래와 같은 내용으로 생성

import org.springframework.context.annotation.Configuration;
import org.springframework.messaging.simp.config.MessageBrokerRegistry;
import org.springframework.web.socket.config.annotation.EnableWebSocket;
import org.springframework.web.socket.config.annotation.EnableWebSocketMessageBroker;
import org.springframework.web.socket.config.annotation.StompEndpointRegistry;
import org.springframework.web.socket.config.annotation.WebSocketConfigurer;
import org.springframework.web.socket.config.annotation.WebSocketHandlerRegistry;
import org.springframework.web.socket.config.annotation.WebSocketMessageBrokerConfigurer;
import lombok.RequiredArgsConstructor;

@Configuration
@EnableWebSocketMessageBroker
@RequiredArgsConstructor
public class WebsocketConfig implements WebSocketMessageBrokerConfigurer {

@Override
    public void configureMessageBroker(MessageBrokerRegistry registry){
        // /pub으로 시작하는 요청은 @Controller의 @MessageMapping 메소드로 라우트됨
        // 클라이언트가 서버로 메세지를 보낼 때 붙여야하는 prefix
        registry.setApplicationDestinationPrefixes("/pub"); 

         //해당 문자열로 시작하는 message 주소값을 받아서 처리하는 Broker를 활성화한다.
        registry.enableSimpleBroker("/sub"); //메세지 구독 주소값
    }

    @Override
    public void registerStompEndpoints(StompEndpointRegistry registry){
        registry.addEndpoint("/websocket")  //클라이언트가 연결할 url
        .setAllowedOriginPatterns("*")
        .withSockJS(); 
        //withSockJS : 웹소켓을 지원하지 않는 환경에서도 웹소켓 사용을 가능하게 해주는 옵션
        //이 옵션을 달면 클라이언트에서 SockJS 라이브러리를 사용해야 함
        //http 아니면 https 로 연결가능(sockJS가 http를 ws로 변환해줌)
    }
}


서버에서 STOMP 메세지 보내기

- convertAndSend 메소드를 호출하면 클라이언트가 구독하고 있는 주소로 메세지가 발행됨.

- /sub/** 주소를 구독하고 있는 클라이언트에게 메세지를 전달하는 예시 

import java.util.HashMap;
import java.util.Map;

import org.springframework.beans.factory.annotation.Autowired;
import org.springframework.messaging.simp.SimpMessagingTemplate;
import org.springframework.stereotype.Component;
import lombok.RequiredArgsConstructor;


@Component
@RequiredArgsConstructor
public class sendService{
    private final SimpMessagingTemplate messagingTemplate;

    public void sendMessageToSubOrderTopic(String message,String id) {
        messagingTemplate.convertAndSend("/sub/"+id, message);
    }
}


서버에서 STOMP 메세지 받아서 전달하기

- 서버가 메세지 브로커 역할 수행

- 특정 클라이언트가 /sub/test 주소로 메세지를 보내면 @MessageMapping에서 받아 @SendTo에 설정된 쪽으로 전달

- /sub/** 을 구독하는 클라이언트가 메세지를 받아볼 수 있는 예시

import org.springframework.beans.factory.annotation.Autowired;
import org.springframework.messaging.handler.annotation.DestinationVariable;
import org.springframework.messaging.handler.annotation.MessageMapping;
import org.springframework.messaging.handler.annotation.SendTo;
import org.springframework.messaging.simp.SimpMessagingTemplate;
import org.springframework.stereotype.Controller;
import org.springframework.web.bind.annotation.GetMapping;
import org.springframework.web.bind.annotation.RequestMapping;
import org.springframework.web.bind.annotation.RestController;

@Controller
public class StompMessageController {
/* 클라이언트에서 웹소켓을 연결한 뒤 /pub/test 로 메세지를 보내면
 여기서 받아 SendTo에 명시된 구독 링크로 메세지를 발행
 prefix는 생략
*/
    @MessageMapping("/test")
    @SendTo("/sub")
    public String processMessage(String message){
        System.out.println("message : " + message);
        return message;

    }

    //STOMP를 쓰면 좋은점
   	/* @Controller 적용된 객체를 이용해 조직적으로 관리할 수 있다.
    	STOMP의 Destination 경로를 기반으로 Spring Security를 적용할 수 있다
    	외부 브로커를 이용해 여러 서버를 관리할 수 있다.
    */


}


그럼 메세지를 구독하고 보내는 클라이언트 페이지를 띄워 테스트를 해보자..

검색해보면 전부 다 APIC으로 테스트를 하던데 APIC자체를 못찾아서 javascript로 짜서 했음. 

html 페이지에 javascript 소스를 넣는다.


메세지 구독하는 클라이언트 페이지 소스 예시 (javascript)

서버에 withSockJS() 설정이 되어있다면 SockJS 를 이용하여 연결해야 하며 이 경우엔 http나 https 로 접속을 해야함.

서버에서 /sub 주소로 구독하고 있는 클라이언트에 메세지를 전달해주므로 

/sub/aaa이나  /sub/bbb 를 구독하는 쪽은 메세지를 다 받을 수 있음. 

<script src="https://cdnjs.cloudflare.com/ajax/libs/sockjs-client/1.6.1/sockjs.min.js" integrity="sha512-1QvjE7BtotQjkq8PxLeF6P46gEpBRXuskzIVgjFpekzFVF4yjRgrQvTG1MTOJ3yQgvTteKAcO7DSZI92+u/yZw==" crossorigin="anonymous" referrerpolicy="no-referrer"></script>
<script src="https://cdnjs.cloudflare.com/ajax/libs/stomp.js/2.3.3/stomp.min.js"></script>

<script type="text/javascript">
var socket = new SockJS("http://localhost:8081/websocket");
stompClient = Stomp.over(socket);
stompClient.connect({}, function (frame) {
    console.log("연결 완료");
    stompClient.subscribe("/sub/aaa",function(response){
        console.log(response.body);
  });	
});
</script>


메세지를 발행하는 클라이언트 페이지 소스 예시(javascript)

<script src="https://cdnjs.cloudflare.com/ajax/libs/sockjs-client/1.6.1/sockjs.min.js" integrity="sha512-1QvjE7BtotQjkq8PxLeF6P46gEpBRXuskzIVgjFpekzFVF4yjRgrQvTG1MTOJ3yQgvTteKAcO7DSZI92+u/yZw==" crossorigin="anonymous" referrerpolicy="no-referrer"></script>
<script src="https://cdnjs.cloudflare.com/ajax/libs/stomp.js/2.3.3/stomp.min.js"></script>

<script type="text/javascript">
var socket = new SockJS("http://localhost:8081/websocket");
stompClient = Stomp.over(socket);
stompClient.connect({}, function (frame) {
    console.log("연결 완료");
    stompClient.send("/pub/test",{},"test메시지입니다.");
});
</script>


SockJS를 안 쓰고 싶다면

서버에서 해당 설정을 없애주고

클라이언트에서는 stomp 라이브러리로 바로 연결하면 댐

<script src="https://cdnjs.cloudflare.com/ajax/libs/sockjs-client/1.6.1/sockjs.min.js" integrity="sha512-1QvjE7BtotQjkq8PxLeF6P46gEpBRXuskzIVgjFpekzFVF4yjRgrQvTG1MTOJ3yQgvTteKAcO7DSZI92+u/yZw==" crossorigin="anonymous" referrerpolicy="no-referrer"></script>
<script src="https://cdnjs.cloudflare.com/ajax/libs/stomp.js/2.3.3/stomp.min.js"></script>
<script type="text/javascript">
var client = Stomp.client("ws://localhost:8081/websocket");
client.connect({},function(){
    console.log("연결 완료");
    client.subscribe("/sub/aaa",function(message){
        console.log("받은 메세지 : " + mesasge);
    });
})
	
</script>
반응형
반응형

1. websocket 연결설정

import org.springframework.context.annotation.Configuration;
import org.springframework.web.socket.config.annotation.EnableWebSocket;
import org.springframework.web.socket.config.annotation.WebSocketConfigurer;
import org.springframework.web.socket.config.annotation.WebSocketHandlerRegistry;

import lombok.RequiredArgsConstructor;

@Configuration
@EnableWebSocket
@RequiredArgsConstructor
public class WebSocketConfig implements WebSocketConfigurer{

    //밑에서 만들 WebSocketHandler 클래스
    private final WebSocketHandler webSocketHandler;

    @Override
    public void registerWebSocketHandlers(WebSocketHandlerRegistry registry){
        registry.addHandler(webSocketHandler,"/websocket").setAllowedOrigins("*");
        // /websocket : 연결url
        //setAllowedOrigins : 웹소켓 cors정책으로, 허용 도메인 지정
        
    }

}


2. websocket 핸들러 생성. web socket 연결 및 종료의 수행에 대한 내용

import java.util.concurrent.ConcurrentHashMap;

import org.springframework.stereotype.Component;
import org.springframework.web.socket.CloseStatus;
import org.springframework.web.socket.TextMessage;
import org.springframework.web.socket.WebSocketSession;
import org.springframework.web.socket.handler.TextWebSocketHandler;

@Component
//TextWebSocketHandler 상속 시 3개의 메소드 오버라이딩
public class WebSocketHandler extends TextWebSocketHandler{
    
    //ConcurrentHashMap : 멀티 스레드 환경에서 사용. entry 아이템별로 락을 건다.
    private static final ConcurrentHashMap<String, WebSocketSession> CLIENTS = new ConcurrentHashMap<String, WebSocketSession>();
    
    public void afterConnectionEstablished(WebSocketSession session)throws Exception{
        CLIENTS.put(session.getId(), session);
        System.out.println("session Id(" + session.getId() + ") 연결");
        //출력예시 : session Id(84693265-e147-0b2c-5505-b2d3c62e62b4) 연결
    }

    @Override
    public void afterConnectionClosed(WebSocketSession session, CloseStatus status) throws Exception{
        CLIENTS.remove(session.getId());
        System.out.println("session Id(" + session.getId() + ") 연결해제");
        //출력예시 : session Id(03017781-abf2-bc66-855e-f217bb99b275) 연결해제
    }

    @Override
    protected void handleTextMessage(WebSocketSession session, TextMessage message) throws Exception{
        String id = session.getId();
        System.out.println(CLIENTS.toString());
        //출력예시 : {03017781-abf2-bc66-855e-f217bb99b275=StandardWebSocketSession[id=03017781-abf2-bc66-855e-f217bb99b275, uri=ws://localhost:8081/websocket]}
        CLIENTS.entrySet().forEach(arg ->{
            if(!arg.getKey().equals(id)){
                try{
                    arg.getValue().sendMessage(message);
                }catch(Exception e){
                    e.printStackTrace();
                }
            }
        });
    }
}


테스트 방법

1. chrome에서 제공하는 확장 프로그램 이용

https://chromewebstore.google.com/detail/websocket-test-client/fgponpodhbmadfljofbimhhlengambbn?pli=1


2. postman에서 제공하는 웹소켓 연결 기능 이용

반응형
반응형

@Autowired 로 주입한 객체가 null이라고 뜨는 경우

-> 의존성 주입이 제대로 되지 않음.


객체를 @Autowired로 주입한 클래스를

new로 생성하였는지 확인한다. 

-> 클래스를 new로 생성하지 말고 @Autowired로 주입시켜 사용하자.


참고))

https://rimkongs.tistory.com/256


[Spring] @Autowired 한 class가 null로 나오는 문제 해결법 (Spring 의존성 주입 문제)

우리는 보통 bean에 의존성 주입을 하고 싶을 때, @Autowired 를 사용하는데요. @Autowired한 class 가 null 이 나왔다는 건, 해당 클래스에 의존성 주입이 제대로 이루어지지 않았다는 것입니다. Spring에서

rimkongs.tistory.com


반응형
반응형

1. dependencies

jpa 의존성과 postgreSQL 의존성 추가

implementation 'org.springframework.boot:spring-boot-starter-data-jpa'
implementation 'org.postgresql:postgresql'


2. application.yml

spring:
##JPA 설정정보
  jpa:
    hibernate:  
      ddl-auto: update  	##update로 해놔야 테이블 update가 됨
      format_sql: true      
      naming:				
        physical-strategy: org.hibernate.boot.model.naming.PhysicalNamingStrategyStandardImpl
	##entity를 camelCase로 작성시 db에는 snake_case로 컬럼명이 들어가게 되는데 이걸 막기위함.

##POSTGRESQL 연결정보
  datasource:
    maximum-pool-size: 4
    url: jdbc:postgresql://${HOST}:5432/mydatabase
    username: ${USERNAME}
    password: ${PASSWORD}
    driver-class-name: org.postgresql.Driver


3. entity 작성

@Entity 어노테이션이 필요하다.

@Table 어노테이션으로 맵핑할 db의 테이블 이름을 적어준다. 

import org.springframework.stereotype.Component;

import javax.persistence.*;
import java.util.Date;

@Component
@Table(name = "member")  //맵핑할 db의 table 이름
@Entity(name = "member")
public class Member {

    @Id //기본 키 매핑
    @GeneratedValue(strategy = GenerationType.AUTO) //자동증가
    private long idx;
    private Date regDate;
    private String age;
    
    public long getIdx() {
        return idx;
    }
    public void setIdx(long idx) {
        this.idx = idx;
    }
    public Date getRegDate(){
        return regDate;
    }
    public void setRegDate(Date regDate){
        this.regDate = regDate;
    }
    public String getAge(){
        return age;
    }
    public void setAge(String age){
        this.age = age;
    }
}


반응형

4. db에 CRUD할 repository 작성

JpaRepository를 상속받고

@Repository 어노테이션을 적어준다.

여기서는 insert만 할거라 save만 적어줌

import kr.co.dominos.order.payment.entity.Member;
import org.springframework.data.jpa.repository.JpaRepository;
import org.springframework.stereotype.Repository;


@Repository
public interface MemberRepository extends JpaRepository<Member,String> {
    Member save(Member member);
}


5. controller로 테스트

import kr.co.dominos.order.payment.entity.Member;
import kr.co.dominos.order.payment.repository.MemberRepository;
import org.springframework.beans.factory.annotation.Autowired;
import org.springframework.web.bind.annotation.RequestMapping;
import org.springframework.web.bind.annotation.RequestMethod;
import org.springframework.web.bind.annotation.RestController;

import java.util.Date;


@RestController
@RequestMapping(value="api")
public class ApiController {

   @Autowired
    MemberRepository memberRepository;

   @Autowired
   Member member;

    @RequestMapping(method = RequestMethod.POST,path = "/save")
    public String savtest() {
        member.setAge("123123");
        Date today = new Date();
        member.setRegDate(today);

        try {
            memberRepository.save(member);
        }catch(Exception e){
            e.printStackTrace();
        }
        return "okok";
    }
}


이외에 다른 db config나 jpa config는 하지 않았음.

반응형
반응형

Windows 에서 설치 및 테스트 하였음


1. H2 다운로드

https://www.h2database.com/html/main.html

windows Installer 다운로드하여 설치하였음.


2. 설치 확인

C:\Program Files (x86)\H2\bin 경로에서 설치파일들 확인하고 bin밑의 h2.bat을 클릭


cmd 창이 켜지며 실행됨. 인터넷 브라우저로 콘솔창이 켜짐.

cmd창을 끄면 db실행이 중단되는 것 같다.


3. 접속하기

브라우저 콘솔창에서 접속해서 H2 Server 이나 H2 Embedded 중 선택하면 됨. 

>> Embedded 모드
시스템의 메인 메모리에서 구동시키는 방식
application이 종료된다면 저장, 수정된 Data가 사라짐.

>> Server모드
하나의 시스템에서 별도의 프로세스(JVM)를 통해 DB를 동작시켜 데이터베이스를 영속적으로 사용하는 방법

이때 연결을  누르면 데이터베이스 파일이 없어서 에러가 뜨는데, 에러에 표시된 경로에 들어가서 내용 없는 파일을 하나 만든다.

새로만들기 > 텍스트파일 (내용은 적지 않고 저장) > 파일 이름은 파일이름.mv.db 

생성 후 다시 연결을 해보면 연결이 된다. 


4. springboot와 연동하기 - 의존성 

h2와 jpa 의존성을 추가하였으며 전체 dependencies 내용은 아래와 같다.

dependencies {
    implementation 'com.h2database:h2'
    implementation 'org.springframework.boot:spring-boot-starter-data-jpa'
    implementation 'org.springframework.boot:spring-boot-starter-thymeleaf'
    implementation 'org.springframework.boot:spring-boot-starter-web'
    implementation 'org.springframework.boot:spring-boot-starter-web-services'
    compileOnly 'org.projectlombok:lombok'
    developmentOnly 'org.springframework.boot:spring-boot-devtools'
    annotationProcessor 'org.springframework.boot:spring-boot-configuration-processor'
    annotationProcessor 'org.projectlombok:lombok'
    testImplementation 'org.springframework.boot:spring-boot-starter-test'
}


5. springboot와 연동하기 - 프로퍼티 설정

application.properties 파일에 아래 내용 추가 

spring.datasource.driver-class-name=org.h2.Driver
spring.datasource.url=jdbc:h2:tcp://localhost/~/springtest1
spring.datasource.username=sa

##JPA 실행시 sql문 출력
spring.jpa.show-sql=true

##테이블 생성여부.. create로 해두면 어플리케이션 실행 시 덮어쓰기로 테이블이 새로 생성됨. 
##데이터도 모두 지워진다는 거~~
##안 할 경우 none
spring.jpa.hibernate.ddl-auto=create


6. Entity 또는 domain 만들기 

테이블과 맵핑할 객체를 만들었다. (Member.java)

- @Entity 어노테이션 추가

- 키 컬럼에 @Id 추가

- 값의 자동생성과 자동증가를 위해 @GeneratedValue 추가

@Entity //객체와 테이블 매핑
public class Member {

    @Id //기본 키 매핑
    @GeneratedValue(strategy = GenerationType.AUTO)
    private long id;

    private String name;

    private String address;

    public long getId() {
        return id;
    }

    public void setId(long id) {
        this.id = id;
    }

    public String getName() {
        return name;
    }

    public void setName(String name) {
        this.name = name;
    }

    public String getAddress(){
        return address;
    }

    public void setAddress(String address){
        this.address = address;
    }
}


7. Repository 만들기

DB에 접근하여 쿼리를 수행할 Repository를 인터페이스로 만들었다. (MemberRepository.java)

- @Repository 어노테이션  추가하고

- JpaRepository를 상속

@Repository
public interface MemberRepository extends JpaRepository<Member, Long> {
    Member save(Member member);
    Optional<Member> findById(Long id);
    Optional<Member> findByName(String name);
    List<Member> findAll();
}


8. 테스트 해보기

테스트용 코드 작성~

@SpringBootTest
class Spring2ApplicationTests {

    private final MemberRepository memberRepository;

    // 의존성 주입
    @Autowired
    public Spring2ApplicationTests(MemberRepository memberRepository) {
        this.memberRepository = memberRepository;
    }

    @Test
    void memberTest() {
        // 멤버 저장
        Member member = new Member();
        member.setName("nameTestAAAAAA");
        member.setAddress("seoulAAAAAA");
        memberRepository.save(member);

        // 저장한 멤버 아이디로 검색
        Member findMember = memberRepository.findById(member.getId()).get();
        System.out.println(findMember.getAddress());
        Assertions.assertThat(member.getName()).isEqualTo(findMember.getName());

    }
}


실행해보면 아래와같이 쿼리와 프린트 결과가 찍힌다~


DB 콘솔에서도 확인

반응형
반응형

maven 스프링 프로젝트에 외부 라이브러리를 추가하려고 함.

1. lib폴더 아래에 외부에서 가져온 jar 파일을 위치시킴.

2. pom.xml 파일의 dependency 부분에 아래처럼 내용을 추가해준다.

<dependency>
	<groupId>barcodes</groupId> <!--이름-->
	<artifactId>barcodes</artifactId> <!--이름-->
	<version>7.2.2</version> <!--버전-->
	<scope>system</scope> <!--scope-->
    	<!--파일위치-->
	<systemPath>${basedir}/src/main/webapp/WEB-INF/lib/barcodes-7.2.2.jar</systemPath> 
</dependency>

아니면 이렇게...

<dependency>
	<groupId>org.apache.tika</groupId>
	<artifactId>tika-core</artifactId>
	<version>2.8.0</version>
</dependency>


3. Eclipse의 경우 pom.xml 저장

프로젝트 우클릭 > Maven > Update Project 


Maven 의존성의 범위에 관해서는 아래 페이지를 참고하였음..


Maven – Introduction to the Dependency Mechanism

Introduction to the Dependency Mechanism Dependency management is a core feature of Maven. Managing dependencies for a single project is easy. Managing dependencies for multi-module projects and applications that consist of hundreds of modules is possible.

maven.apache.org


Dependency Scope

  • compile
    아무 것도 지정되지 않은 경우 사용되는 기본 범위.
    모든 클래스 경로에서 사용가능함.
  • provided
    런타임시에는 포함X, 컴파일 시점에만 포함됨. runtime시에 JDK나 컨테이너가 dependency를 제공할 것으로 간주하여 런타임시에는 classpath에 추가되지 않음.
  • runtime
    컴파일에는 포함X, 런타임과 test 시에만 포함됨.
  • test
    테스트 컴파일 및 실행 단계에만 포함
  • system
    JAR의 위치를 명시해야함. 항상 사용가능하며 레포지토리가 아닌 외부에서 찾음
  • import
    <dependencyManagement> 부분에서만 사용됨.     
반응형
반응형

Spring Boot 환경에서 vue 설치하여 사용하기

IDE : intellij


1. Spring 프로젝트를 만들자


[SpringBoot] intellij 에서 Gradle을 포함한 SpringBoot 프로젝트 만들기

상단 메뉴바 File > New > Project Gradle, Java 선택, Next 프로젝트 이름이랑 경로 지정 프로젝트에서 build.gradle에서 의존성 설정 plugins { id 'org.springframework.boot' version '2.5.0' id 'io.sprin..

mchch.tistory.com


2. VUE CLI를 설치하자


[Vue] vue.js 설치/실행, 싱글파일 컴포넌트

1. Node.js 설치 다운로드 | Node.js Node.js® is a JavaScript runtime built on Chrome's V8 JavaScript engine. nodejs.org 2. VUE CLI 전역설치 > npm install -g @vue/cli -g : 로컬 어디에서든 vue-cli를..

mchch.tistory.com


3. vue 프로젝트를 만들자


터미널에서 입력한다. > vue create '프로젝트이름'

옵션들을 선택하게 된다.


프리셋 선택

Default 설치는 Router가 없다

Manually 설치는 Router를 설치할 수 있다.


Manually 설치를 선택하면 기능을 선택할 수 있다. 

방향키로 움직이고 스페이스로 선택. Router를 넣었당


버전선택


모드 선택

Vue는 기본적으로 Hash 모드이며, History 모드로 사용할 것인지 선택하게 된다.

Hash 모드는 url 뒤에 #이 붙는다. History모드는 url뒤에 #이 붙지 않는다. 

아직은 잘 모르니 n으로 가자..


Hash Mode와 History Mode 설명


[Vue] vue-router에서 Hash Mode Vs History Mode 차이점은 무엇인가?

들어가기 최근 Vue 를 사용하게 되면서 Hash Mode와 History Mode에 대해서 의문점을 가지게 되었습니다. Vue.js에 router 관련된 설정을 추가하면서 다음과 같은 설정에 직면하게 되었습니다. import Vue from

happy-coding-day.tistory.com


나머지 항목들도 잘 모르니 일단은 기본으로 선택했다.

완료되면 디렉토리가 생긴당.


4. 뷰 프로젝트 설정

뷰 디렉토리 밑에 vue.config.js 파일을 생성한다.


파일 내용

module.exports = {
  //outputDir : npm run build로 빌드 시에 파일이 생성되는 위치
  outputDir: "../src/main/resources/static",
  //indexPath : index.html 파일이 생성될 위치
  indexPath: "../static/index.html",
  //SpringBoot 서버 접속 주소
  devServer: {
    proxy: "http://localhost:8080"
  },
  chainWebpack: config => {
    const svgRule = config.module.rule("svg");
    svgRule.uses.clear();
    svgRule.use("vue-svg-loader").loader("vue-svg-loader");
  }
};


5. 빌드

터미널에서 vue 프로젝트 디렉토리로 이동한 뒤에

> npm run build 입력

완료되니 resources 밑에 index.html과 소스들이 생겼다.

안생겼으면 껐다가 다시 열기 


6. 실행

spring 을 실행하고 

터미널에서 >npm run serve 를 입력하고 나면 완료된다.


반응형
반응형

상단 메뉴바 File > New > Project


Gradle, Java 선택, Next


프로젝트 이름이랑 경로 지정

프로젝트에서 

build.gradle에서 의존성 설정

plugins {
    id 'org.springframework.boot' version '2.5.0'
    id 'io.spring.dependency-management' version '1.0.11.RELEASE'
    id 'java'
}

group 'org.example'
version '1.0-SNAPSHOT'

repositories {
    mavenCentral()
}

dependencies {

    implementation 'org.springframework.boot:spring-boot-starter-web'
    implementation 'org.springframework.boot:spring-boot-starter-thymeleaf'

    testImplementation 'org.junit.jupiter:junit-jupiter-api:5.7.0'
    testRuntimeOnly 'org.junit.jupiter:junit-jupiter-engine:5.7.0'
}

test {
    useJUnitPlatform()
}


java 디렉토리 밑에 패키지랑 controller 등 이것저것 뚝딱뚝딱


RunApplication 내용

package com.export;

import org.springframework.boot.SpringApplication;
import org.springframework.boot.autoconfigure.SpringBootApplication;

@SpringBootApplication
public class RunApplication {
    public static void main(String[] args){
        SpringApplication.run(RunApplication.class,args);
    }
}


기본적인 실행을 위한 Controller 내용

package com.export.controller;

import org.springframework.stereotype.Controller;
import org.springframework.web.bind.annotation.RequestMapping;

@Controller
public class MainController {
    @RequestMapping(value = "/home")
    public String main() throws Exception {
        return "index";

    }
}


참고


Building an Application with Spring Boot

this guide is designed to get you productive as quickly as possible and using the latest Spring project releases and techniques as recommended by the Spring team

spring.io


반응형
반응형

** WARNING ** : Your ApplicationContext is unlikely to start due to a @ComponentScan of the default package.

SpringBoot 프로젝트 생성 후 실행하려 하니 위와 같은 에러가 났다..


실행용 RunApplication은 java 바로 밑에 있음.

자바 class파일은 java > com > export 패키지에 있음

=> 위치가 달라서 ComponentScan하는데에 문제가 생긴 것 같음..


해결방안 : 위치를 통일시켜 준다.

RunApplication 파일의 위치를 com.export 밑으로 이동시킨다.

package com.export에 포함되었다.

package com.export;

import org.springframework.boot.SpringApplication;
import org.springframework.boot.autoconfigure.SpringBootApplication;

@SpringBootApplication
public class RunApplication {
    public static void main(String[] args){
        SpringApplication.run(RunApplication.class,args);
    }
}


아니면 자바 class 파일들을 java 폴더 바로 밑으로 옮기든지...

반응형
반응형

jar 파일 실행시 spring의 환경설정을 변경하게 해줌.


application.properties의 내용 중 profiles.active의 값

java 실행 명령어 입력 시

application.properties의 내용 중 profiles > active의 값을 변경할 경우

옵션을 다음과 같이 준다.

-Dspring.profiles.active = local


예시

//active 할 profile 설정
java -jar -Dspring.profiles.active=dev ./test.jar

//springApplication의 프로퍼티설정파일의 이름을 변경
java -jar myproject.jar --spring.config.name=myproject

//프로퍼티설정파일의 경로를 명시하여 특정 파일을 참조하게 한다.
java -jar -Dspring.config.location=classpath:/application.properties,/home/ec2-user/app/application-oauth.properties

//classpath가 붙으면 jar 안에 있는 resources 디렉토리를 기준으로 경로가 생성됨.
//classpath가 없는 경우는 외부에 파일이 있어서 절대경로를 명시한 경우임.


Dspring 및 spring 환경설정 관련하여 참조할 수 있는 페이지


Spring Boot Features

Graceful shutdown is supported with all four embedded web servers (Jetty, Reactor Netty, Tomcat, and Undertow) and with both reactive and Servlet-based web applications. It occurs as part of closing the application context and is performed in the earliest

docs.spring.io


[Spring Boot] 외부에서 설정 주입하기 - Increment

4.2. 외부에서 설정 주입하기 Spring boot 애플리케이션의 설정 값을 외부에서 전달하는 방법을 다룹니다. 기준 버전은 2.2x입니다. Spring Boot는 동일한 애플리케이션 코드를 다른 환경에서 작업할 수

www.latera.kr


반응형

+ Recent posts