fetch 사용하다가...
fetch("http://localhost:8081/startDown",{
method : 'POST',
mode : 'cors',
cache : 'no-cache',
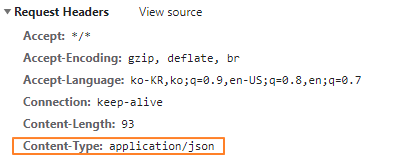
headers: {'Content-Type': 'application/json'},
credentials : 'same-origin',
redirect : 'follow',
referrer : 'no-referrer',
body: JSON.stringify(this.obj)
}).then(response => response.text()) // 첫번째 then
.then(res=>{ console.log(res); }) // 두번째 then왜 위처럼 첫번째 단계에서 response.text() 한 것을 바로 사용하지 않고 .then을 한 번 더 쓰는건지 궁금했다.
왜 아래처럼 첫번째 then에서 파싱한걸 바로 사용하지 않는건지...
 fetch("url",{option}).then(response => {
            	let res = response.text();

            })
이래저래 내린 결론
- 첫 번째 then 단계에서는 response의 status 결과를 보고 어떻게 처리할지 결정할 수 있게 한다.
- 첫 번째 단계에서는 body가 load되길 기다린다. 즉. body가 다 안 왔을 수 있다는 것. 그래서 promise를 반환한다.
- response.text()로 파싱하는 경우 promise를 반환한다. 이 promise에 담긴 값을 사용하려면 두 번째 .then으로 받아서 promise 내부의 PromiseResult 를 사용해야 한다.
우선 promise와 .then은 이렇게 이해했다.
- promise : 비동기 코드가 끝나면 반환된다. 비동기 처리의 상태와 데이터를 담게 되어 있다.
- .then : 비동기 처리가 끝난 다음에 처리할 일을 정의할 수 있다.
1) fetch의 결과 출력해보기
let res = fetch("http://localhost:8081/startDown",{
                method : 'POST',
                 mode : 'cors',
                 cache : 'no-cache',
                 headers: {'Content-Type': 'application/json'},
                 credentials : 'same-origin',
                 redirect : 'follow',
                 referrer : 'no-referrer',
                 body: JSON.stringify(this.obj)
            })
console.log(res)
fetch의 결과로 Promise가 반환되었다.
pending 상태의 Promise가 찍힌것이 보이고, 화살표를 눌러 펼쳐보면 fulfilled(이행)상태가 된 것을 알 수 있다.
이행(완료)된 Promise의 Result엔 http 통신 결과로 응답 정보를 담고있는 Response Object 가 보임..
Response의 header를 보고 요청이 성공했는지 아닌지 확인 가능.

2) fetch의 결과를 .then으로 출력해보기
 fetch("",{}) //fetch url과 옵션은 생략
 	.then(console.log)
.then이 promise를 까서 Result인 Response object를 보여준다.
이 Response의 body를 읽으려면 response.text()나 json()같은 메소드를 사용한다.

- status – HTTP 상태 코드(예: 200)
- ok – 불린 값. HTTP 상태 코드가 200과 299 사이일 경우 true
3. 첫번째 then 안에서 response.text()를 한 뒤 결과물 출력해 보기
 fetch("",{ })
 	.then(response => {
                let pr = response.text();
                console.log(pr);
            })
Promise가 반환되는데, <pending>상태이지만 눌러보면 fulfilled라고 나온다.

[i]에 이런 메세지가 보인다.

"This value was evaluated upon first expanding. It may have changed since then."
console.log가 비동기로 실행되기 때문에 console.log를 찍을 시점에는 promise가 pending 상태였으나 이후에 fulfilled 상태가 된 것을 보여준다.
response.text() 를 한 후 3초를 기다려서 출력해보았다
}).then(response => {
                let pr = response.text();
                setTimeout(function(){console.log(pr)},3000);
            })
아까랑 다르게 찍는 시점에서 이미 fulfilled 상태이다.

4. 두 번째 then에서 값 출력해보기
첫 번째 .then에서 반환해준 Promise를 두 번째 .then에서 받아 PromiseResult에 담긴 값을 사용한다.
response.text() 후에 .then에서 값을 출력해보면
PromiseResult의 값이 출력되었다
fetch("",{})
	.then(response => response.text())
	.then(console.log)
참고
fetch
ko.javascript.info
프라미스(Promise)
0px Promise는 무엇인가? Promise의 state와 result Promise chaining return Promise Error handling Promise API async, await Promise는 무엇인가? 단어 그대로 약속(promise)입니다. 어떤 약속이냐면 어떠한..
snowboolean.tistory.com
fetch() 함수 사용법 - Blog by Yeri
백앤드로부터 데이터를 받아오려면 api를 호출하고 데이터를 응답받습니다. 이 때 자바스크립트 Web API fetch() 함수를 쓰거나 axios 라이브러리를 사용할 수 있습니다. 참고로 Web API는 클라이언트
yeri-kim.github.io
Why is the response object from JavaScript fetch API a promise?
When requesting from a server with JavaScript fetch API, you have to do something like fetch(API) .then(response => response.json()) .catch(err => console.log(err)) Here, response.json(...
stackoverflow.com
'코딩 관련 > Javascript와 jQuery, JSON' 카테고리의 다른 글
| [Javascript] decodeURI encodeURI, url 인코딩, url 디코딩 (0) | 2021.10.20 |
|---|---|
| [Javascript] 클릭한 DOM 요소 가져오기 / 자식 요소 선택 querySelector / 부모 요소 선택 / queryselector (0) | 2021.10.05 |
| [AJAX] ajax success, error 사용 / error 파라미터 (5) | 2021.08.31 |
| [JAVA][JavaScript] AJAX JSON 전송 / Fetch JSON 전송 / Controller JSON 받기 (0) | 2021.08.25 |
| [JavaScript] 엑셀 파일 읽기. read excel file (2) | 2021.08.19 |